Monday, July 22, 2013

All done but only 85% happy


I guess it's no surprise that I'm not totally thrilled with the end result. I never am, at least immediately after finishing the project. Weeks or months later I'll look back and realize its not half bad, or even that it's pretty good. This morning it looks like a big pile of blargh.

My eyes are blurry after my weekend of marathon point tweaking! I finished up late last night, like almost 2AM, and thought I messed up while uploading. My clicky finger *may* have gotten a bit impatient. So I sent an email to them; turns out they got SOMEthing. Hopefully it's the whole jpg. I really need to chill out sometimes.

Working on this brought back memories -- of that half-sphere climbing thing at the park by the Buffalo Zoo (need to dig out the photo of 4 year old me and friend on one with my giant sideburned dad standing alongside), the rocket slide (we had one outside our kindergarten classroom), those merry go round things that made me sick to my stomach, that pedal car that scrawny me never could quite pedal.

We had a tire swing tied to the cherry tree in front of our house and an old metal swingset in the back that had regular swings and a sky scooter. Swinging was one of my favorite thing to do as a kid. I have flashes of memories: standing on and falling off the sky scooter and ending up with a mouthful of sand, watching the combine work the field next to the house and feeling so proud to be five and able to swing as high as I could, the wren that would nest in the open end of the swingset every spring, poison ivy growing over the old stone wall that we were forbidden to climb on for just that reason... Good memories.

Friday, July 19, 2013

Panicking & Illustrating


That's what I always do. I think of all these great ideas, then wait until almost the last minute to start, then get almost immediately discouraged and panicky because the vision I had in my head is *not* what's happening in my sketchbook / on my computer.

Somehow in the end it always works out. Why is it that in the meantime it must always be such torture???

I'm a little more stressed out than normal because this is an ultra-important illustration. It's for Lilla Rogers Global Talent Search, and the winner gets all sorts of really fantastic stuff like a 2-year contract with Lilla Rogers (whose artists and clients I have admired hugely for years... heck, even her website is fun to look at!) and a bundle of amazing licensing deals.

The competition is going to be stiff. I think all the "real" illustrators (those with years of experience and a long list of clients) are participating, too, so I'm feeling a little bit inadequate. I have no idea how many. I don't think I stand a chance. But then why did I enter, you ask??

Because with three little kids, a geriatric cat, three cockatiels, a puppy, and no babysitter, I need something like this to motivate me to make something amazing. I know I can do it -- and I love drawing wacky little vintage-inspired characters -- I just need the proverbial kick in the rear to ignore the dirty dishes, laundry, constant interruptions for more entertainment, more ice, more crackers, more drink, the perpetual household to-do list, and focus (ha, focus, what's that??) on my drawing.

Anyway, this is what I wrestled into being last night at about 12:30 AM. It's a decent start. It's only due Monday by 11 AM. Ha.

Friday, June 28, 2013

Sew what?

My 2nd quilt ever


I think I'm a fabric hoarder. My stash is now overflowing out of my sewing cabinet and fills three plastic bins in the basement.

Why don't I just get to work and make some stuff?? I WANT to... but... I like some of the fabrics so much (like Alexander Henry's Folklorico collection) I don't want to cut them up. But mostly, I don't have the time or space right now to set up a big sewing project.

In four years, #3 will be in all-day kindergarten and the puppy should have grown out of her devil phase (she had better be, before she eats our entire house and yard...); and THEN I have big crafty plans.

In the meantime, I have been feverishly working my way through  Jennifer Chiaverini's Elm Creek Quilts books, like how I marathon-watched Mad Men and Downton Abbey on Netflix. And I'm making a list of stuff I want to make and do:

  • A modern quilt 
  • Seat-back organizers for the car
  • Dresses and skirts for me and the girls
  • Curtains for our abnormally tall patio door
  • A faux stained glass panel for above that abnormally tall patio door
  • Paper/fabric hybrid crafts
  • Woodworking something or other
  • Knitting
  • Take lots of naps
  • Get a haircut


Sunday, April 21, 2013

Birdcages, Family Trees and Tragedies


A couple months ago I signed up for Kerry Bradford's History Project. I've always been interested in genealogy, and I especially love anecdotes about characters like my great-great-great grandfather who had flaming red hair and was a soldier in the Prussian army, or the story of how my great-great grandfather lost an eye (it's a bit gruesome), or my great-great grandmother Wilhelmina who loved to sew. I wanted to record those little details about myself for my kids and their kids -- why zucchini gives me the willies, why I kicked a nun, why I love nature.

During my reminiscing, I thought a lot about things I did and experienced that led me to here and now. It's funny how, in the midst of things, nothing makes sense and at times it's utter chaos, yet years later it's crystal clear that one thing definitively led to another which led to this moment right now, and things DID work out just fine after all.


Or, everything happens for a reason. And, things always look better in the morning (as my parents' Dutch friend John Hoomans was fond of saying.)

I knew from the time I was three that I wanted to be an artist when I grew up. In college I assumed I'd be a painter, exhibiting in galleries and working odd jobs in the side. However, my first job after college was laying out supermarket flyers for mom and pop grocery stores in Chicago. I hated it. I hated the stress and the cigarette smoke in the art room and especially hated putting so much effort and care into something so disposable, something that made no difference to anyone in the world except the owner of the store and the owner of the printing company I worked for.

I tried some other things... children's book illustration, mural painting, teaching, graphic design, crafts, jewelrymaking.... nothing really ever fit. Then serendipity led me to art licensing. It was perfect. I loved it!


Except there was still that nagging, occasional feeling that I wasn't making a difference. To me, my family, sure, but to the world at large, not so much. I volunteered my design skills here and there, but I'd think about it sometimes... what else or what more can I do?

My college friend Brenna was published in a book, which my husband bought me this year for my birthday (the book is hilarious, by the way.) I read it in a couple days and started following the blogs of some of the authors. Along the way I followed links to other mom blogs and, in addition to tales of normal mom life, holy cow... I read agonizing stories about kids just like mine that one day are bringing home backpacks full of schoolwork and odd little bits of paper and rocks, and the next day they spike a fever that turns out to be something much more, or they're in the ICU in acute organ failure, or they slip through the fence surrounding a pool... it's one of my worst fears as a mom of three, and reading these stories is truly 
terrifying.

In particular, one mother, Kate Leong's blog really stuck in my mind. Their little boy Gavin looks so much like my two year old. Gavin's story is amazing, he overcame RSV, botulism, and supposedly permanent hearing loss. He was doing SO well. One day last week he developed a slight fever, and went into cardiac arrest, and way too quickly he was gone, just like that. I followed along on his mom's blog. It was heart-wrenching. In the midst of it all, his parents made the decision to donate Gavin's organs... SUPERhero Gavin, off to save lives, read the sign on his bed. 


At the same time last week, a friend of a friend's little boy's liver suddenly quit working. He was fine, then one day he was jaundiced, then he was in the hospital awaiting a liver transplant. He just had the transplant and I hear he is doing spectacularly well.


What amazes me in all of these stories, and in daily life with my own kids, is how resilient and fearless they are. Reading about these kids going through chemo or surgery reinforces that for me. They deal with much more than most adults could. Like superheroes. Gavin's mom Kate wrote many times about how her son is a superhero. That struck a chord and sparked an idea.


So here's my plan. I designed a bunch of coordinating superhero-themed shapes, in honor and memory of these superhero kids and their families. The shapes are going to be available in the Silhouette store this week. I'm going to donate my royalties (my portion of sales) from the shapes to four charities, one per week, for a month. I haven't decided which charities, but I'll figure that out in the next couple days. The charities will directly benefit children, though, I do know that.


I hope this little thing that I *can* do will help someone, just a little bit.

Sunday, March 31, 2013

3D watering can instructions


Here is a downloadable JPG with instructions for my 3D watering can, available this week in the Silhouette store.

I've been experimenting with cylindrical shapes lately, and they are quite a bit more challenging than straight-edged ones. I cut and assembled over three of these before I got it right. Usually I can envision 3D shapes in my head and they generally turn out like I thought they would... not so much these curved ones!

Please let me know if anything isn't clear. I need to step away from Illustrator now. :)


Saturday, February 2, 2013

The sketchbook, c. 2009


I used to do some freelance work for a Chicago creative agency, and for Christmas '08 they sent me a sketchbook. It was right after our second child was born, and after over three years of pregnancies, newborns and babies taking over my world, I resolved to get back to my roots -- fine art -- and fill up the sketchbook the following year.

Of course, stuff happened (baby #3, we tried to sell our house, husband got a new job, I got a new licensing deal), and the sketchbook remained 95% empty until recently.

When I got really obsessed with fabric designs, I started finding inspiration for prints all over the place. I needed a place to record them, and found that neglected sketchbook.

Sadly, it's not the only one. I have a big box of half- and quarter-filled sketchbooks, and even a stack of blank ones I bought for (why, again??) some long forgotten reason. Maybe it was before marriage and kids, when I had a regular paycheck and aspirations of wandering all over and recording it all in travel sketchbooks.

Some of my favorites: Canson and Arches make nice wide-format watercolor sketchbooks that are perfect for landscapes. (I have a couple of those... still blank... but I've used their paper in sketchbook form with mixed media (Canson), and for many-layered watercolors (Arches) and have been impressed with the quality.) Moleskine also has a watercolor one that's great for recording a really wide-angle view, since it's a flat bound book, not wire-bound. (I have one -- but it has only three quickie watercolors from 2010 in it.)

The good news is, that sketchbook from '08 is just seven pages from being full. Mostly on both sides of each page, too!

The bad news is, the sketches are really just that: quick, ugly, chicken-scratch-y. Mostly done with a half dried out Pigma Micron pen. A few magazine scraps glued on here and there. Nothing I'll ever win an award for. But all together, I like them. They're full of ideas, but not too precious, and there are a ton of them.

Now I have plans for the rest of those sketchbooks in that box in the basement.

_____________________

For anyone who loves pen, pencil, watercolor, a spiral bound blank book, and a couple hours of free time, here are a few of my favorite artists and sketchbooks for inspiration.


Monday, December 10, 2012

Pinfeathers Pincushion Tutorial

I've finally gotten around to reproducing the tutorial on my own blog. It only took, um, almost a month... (yikes...) Someday I will miss these crazy, hectic, tiring days, right?!


PINFEATHERS
He's a pincushion, plus a keeper of needles and little notions that are easily misplaced... very handy to have next to your sewing machine!


I used Riley Blake's Flutter collection for my pincushion. I love the bright colors of these fabrics, and their combination of floral/nature motifs and handwritten words makes this owl-shaped pincushion a bit unexpected, I think.

Here's how to make one for yourself!


Materials:

- Fabric: about 1/8 yard each of 5 different fabrics (I used Riley Blake’s Flutter collection); scrap of orange felt; scrap of off-white felt; scrap of dark gray fabric

- fusible fleece or other heavyweight interfacing for wings

- lightweight interfacing for eyes, pocket, forehead

- fiberfill stuffing or ground walnut shells

- plastic pellets or rice to weight owl

- sewing machine, scissors, pinking shears, thread, pins, needle, printer

Step 1 - Cutting & Interfacing

1. Print pattern pieces, making sure page is set to print at 100% (in the print dialog box, choose “none” instead of “fit to printable area.”) Pin and cut pattern pieces, noting whether one or two are needed. Transfer markings to fabric: black triangles and black dots.

When cutting wing pieces (D), lay outside and inside fabrics RST, pin and cut. Then flip over wing pattern piece (D) when cutting opposite wing pieces.

Cut bottom eye pattern piece (F) with pinking shears to create a ruffled look.

Pinning wings, one side has fusible fleece ironed on

2. Iron lightweight interfacing to wrong side of forehead (A), eye-middle (G), eye-pupil (H), and outside piece of pocket (E). Iron fusible fleece to wrong side of outside piece of wings (see photo, above). On mine, I wanted the green fabric to be on the outside, so I ironed the fusible fleece to the two green wing pieces.

Figuring out where to place eyes, wings & beak


Step 2 - Owl Body

3. Match up top of forehead (A.) to top of body front (B.), pin and sew forehead to body, using a satin stitch along bottom, where indicated on pattern piece, from ear tip to tip. (I used a zig zag stitch, settings of 4.0 / 0.6. Anything closer together tended to pucker the fabric.)

4. Pin and sew beak to owl body front, covering up bottom of forehead. Refer to photo, above, for placement.

Sewing eyes to body


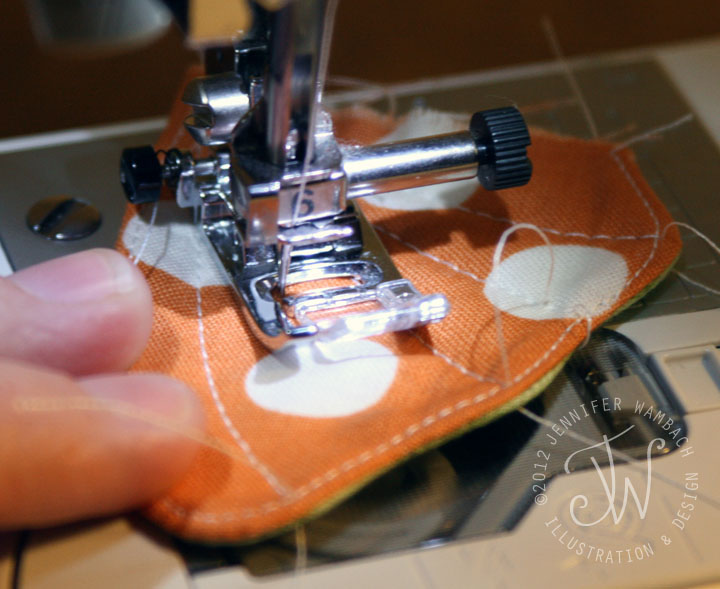
5. Stack eye pieces, largest to smallest (F, G, H), sew around each circle as shown in photo. Pin to owl on either side of beak, just under forehead and touching the top corners of beak (see photos for placement.) Sew just outside middle eye piece (G) to attach to body.

Pinning pocket, RST; pocket sewn to body, showing gap

6. Put two pockets pieces together, RST, sew around perimeter with 1/4” seam allowance, leaving about 1 inch open on bottom for turning (indicated by black dots on pattern.) Turn, pushing out corners with pointed but blunt object -- a knitting needle, or the wooden stick that comes in bags of fiberfill is ideal.

Top stitch only the top of pocket. Tuck edges of opening to inside, pin pocket to owl body, centering pocket in the middle and placing it about 1/4” below tip of beak. Pin, gapping top of pocket out slightly so it won’t become too tight once owl is stuffed (see photo). Sew to owl body just along edge of sides and bottom.
Topstitching wing (top); sewing "feather" lines (middle); finished wing (bottom)


Step 3 - Wings

7. Place wing pieces together, RST (fusible fleece will be on outside of one side), sew around edges, leaving flat side open. Turn, press, top stitch only around curved part of wings.

8. Sew lines for feathers. You can use the pattern as a template for placement, or just wing it (ha ha), as I did.


Wings pinned to body
Base pinned to bottom of body
Body all sewn up and turned right side out, showing opening for stuffing


Step 4 - The part that makes slogging through the not-so-fun sewing, seam ripping, and re-sewing all worth it!

9. Pin wings at sides of owl body front (flat, unsewn edge of wing will be even with outside edge of owl body — see photo, above), matching the edge of body with edge of wings. Place the top of wings slightly higher than top of pocket.

10. Pin front and back of owl body together, RST, sew with 1/4” seam allowance. Sew only around sides and top, leaving bottom open. Clip tips of ears.

11. Pin base to bottom of owl body, matching black triangles on pattern pieces. Make sure to insert feet in front where indicated by black triangle, facing the front of feet towards the inside. (See 2nd photo above, where the back of feet are peeking out.) Sew, leaving about 1 inch open for turning and stuffing, as indicated by black dots on pattern piece.

12. Turn, poke out ears, stuff with either fiberfill or crushed walnut shells. If using fiberfill, toss in a handful of plastic pellets at the bottom to weight it. Hand-sew opening shut.

Enjoy!

This little guy is really useful. He’s a pincushion, he holds needles inside his wings, and he keeps little things in his pocket that are essential to the operation of the sewing machine, things that also seem to be irresistible to a toddler (personal experience here!), like bobbins and seam rippers. He’s also kinda cute!

Why owls? I've always had a thing for them ever since growing up in the house next to the woods in a fairly rural area in New York State. We'd often hear Great Horned Owls at night back in the woods, calling to each other.

We actually had wildlife-a-plenty around that house: foxes, deer wandering through our back yard, possums in the shrubs, snakes, giant green bugs, pheasants, and in recent years there have even been a few black bears raiding residents' bird feeders. And we had our own "wildlife": a flock of chickens, a few ducks, two geese and two goats, and my little brother and me, of course. :)

I never did see an owl in real life, except in zoos and rehabilitation centers, until very recently. Although I now live in the suburbs of a large city, I've seen three Great Horned Owls sitting on neighbors' rooftops... pretty cool, I think!